PHP Installation
PHP is a popular programming language that is widely used for web development. If you're interested in building web applications using PHP, the first step is to install PHP on your machine. In this article, we'll take a look at how to install PHP on various operating systems.
Installation on Windows
Step 1: Download PHP
The first step to installing PHP on Windows is to download the PHP binary from the official PHP website. You can download the latest version of PHP from this
PHP Download
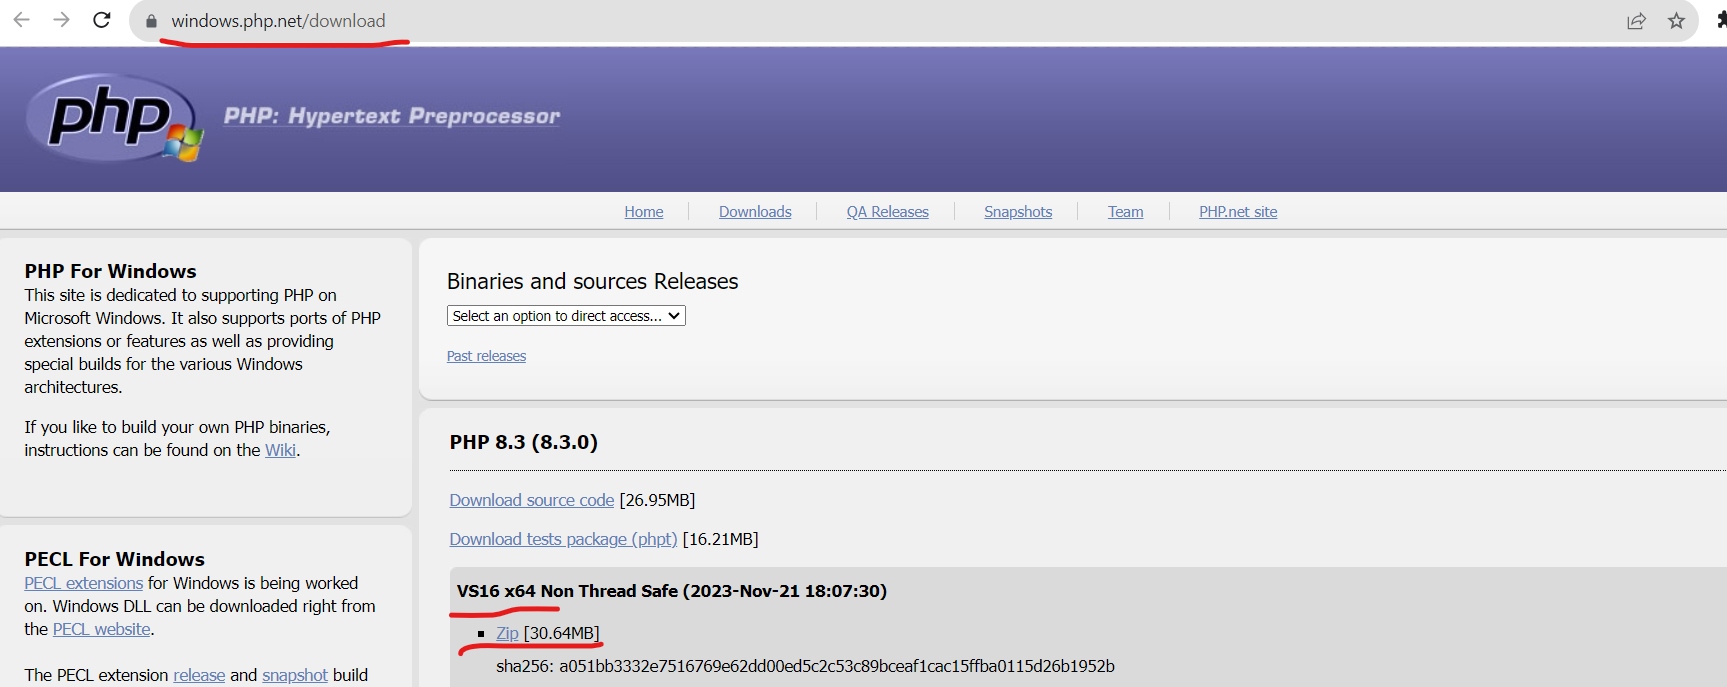
Choose the ZIP file for the VC15 x64 version of PHP and download it to your computer.
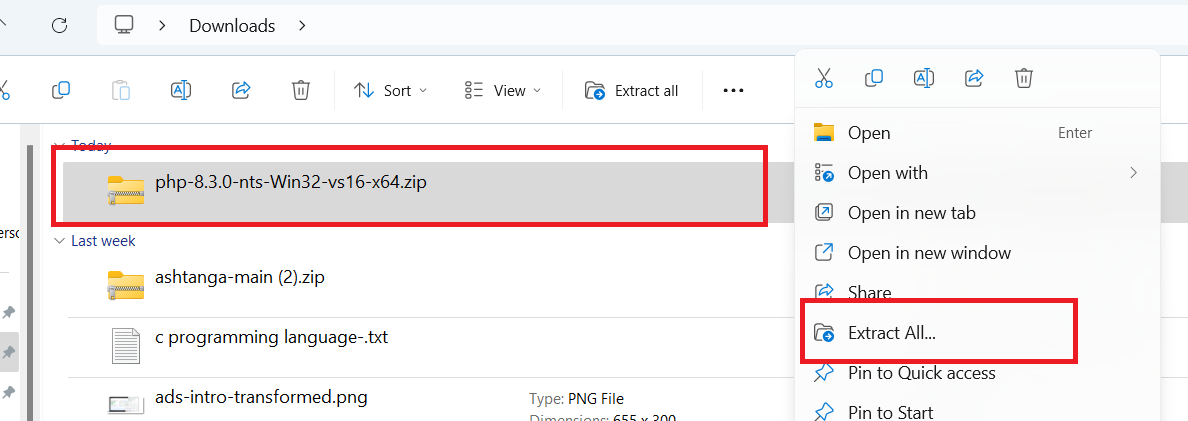
Step 2: Extract PHP
Once the PHP ZIP file has been downloaded, extract it to a folder on your machine. For example, you can extract it to C:\php.
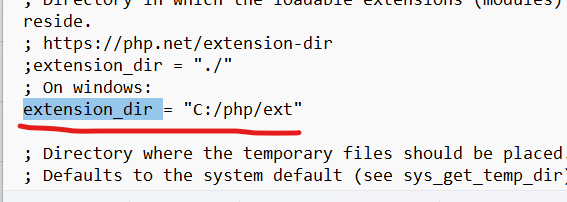
Step 3: Configure PHP
Next, you need to configure PHP by creating a copy of the php.ini-development file that comes with the PHP distribution. Rename this file to php.ini.
Open the php.ini file in a text editor and search for the following line:
;extension_dir = "ext"
Remove the semicolon (;) to uncomment the line, and adjust the path to the directory where the PHP extensions are located. For example:
extension_dir = "C:/php/ext"
Step 4: Add PHP to the System Path
You need to add the path to the PHP installation directory to the system path so that you can run PHP from the command line.
To add the path to the system path, follow these steps:
- Open the Start menu and search for "Environment Variables".
- Click on "Edit the system environment variables".
- Click on the "Environment Variables" button.
- Under "System Variables", scroll down and find the "Path" variable. Click on "Edit".
- Click on "New" and add the path to the PHP installation directory. For example,
C:\php.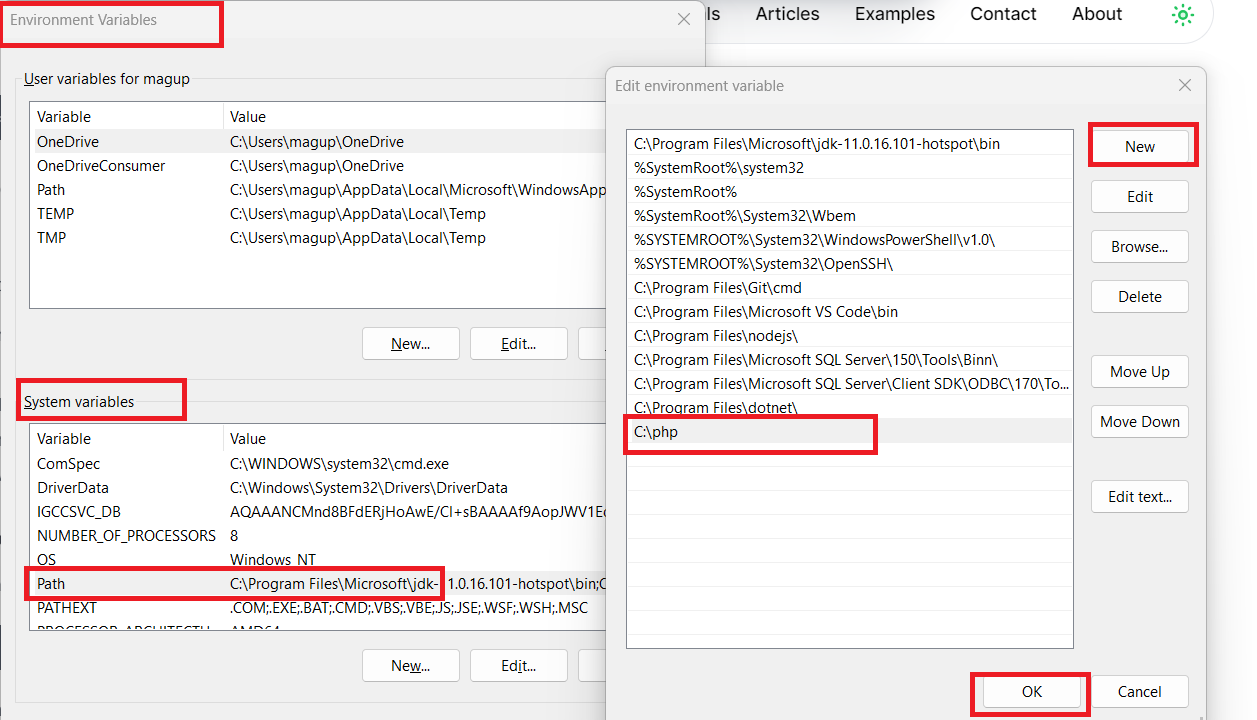
Step 5: Test PHP
To test PHP, open a command prompt and run the following command:
php -v
 This should display the version of PHP that you have installed on your machine.
Installation on macOS
Step 1: Install Homebrew
Homebrew is a package manager for macOS that makes it easy to install software. To install Homebrew, open a terminal and run the following command:
/usr/bin/ruby -e "$(curl -fsSL https://raw.githubusercontent.com/Homebrew/install/master/install)"
Step 2: Install PHP
Once Homebrew is installed, you can use it to install PHP. Simply run the following command in the terminal:
brew install php
Homebrew will install PHP and its dependencies.
Step 3: Test PHP
To test PHP, open a terminal and run the following command:
php -v
This should display the version of PHP that you have installed on your machine.
Installation on Linux
The process of installing PHP on Linux varies depending on the distribution and package manager you are using. Here, we'll look at how to install PHP on Debian-based distributions like Ubuntu.
Step 1: Update Packages
The first step is to update the packages on your machine. Open a terminal and run the following command:
sudo apt-get update
Step 2: Install PHP
Once the packages have been updated, you can install PHP by running the following command:
sudo apt-get install php
This will install PHP and its dependencies.
Step 3: Test PHP
To test PHP, open a terminal and run the following command:
php -v
This should display the version of PHP that you have installed on your machine.
Important Points
- PHP can be installed on Windows, macOS, and Linux.
- On Windows, PHP can be downloaded from the official PHP website and installed manually.
- On macOS, PHP can be installed using Homebrew.
- On Linux, PHP can be installed using the package manager.
Summary
Installing PHP is a straightforward process that requires downloading and extracting the PHP binary, configuring PHP, and adding PHP to the system path. On macOS, PHP can be installed using Homebrew, and on Linux, it can be installed using the package manager. Once PHP is installed, it can be tested by running the command "php -v" in a terminal.